In this post, I'll lay out the details of the electric (heatstick) based system that I have been using. As I mentioned in my previous post, an electric system was what I settled on after considering a propane system.
There seems to be some trepidation in the brewing community regarding systems that involve water and electricity, and with good reason. If you don't have your system properly designed and installed it could mean a nasty shock at the least, and death at worst. Without a good understanding of electricity, putting together an electric heating system is a daunting task, and is probably one reason why propane is more popular, at least for now.
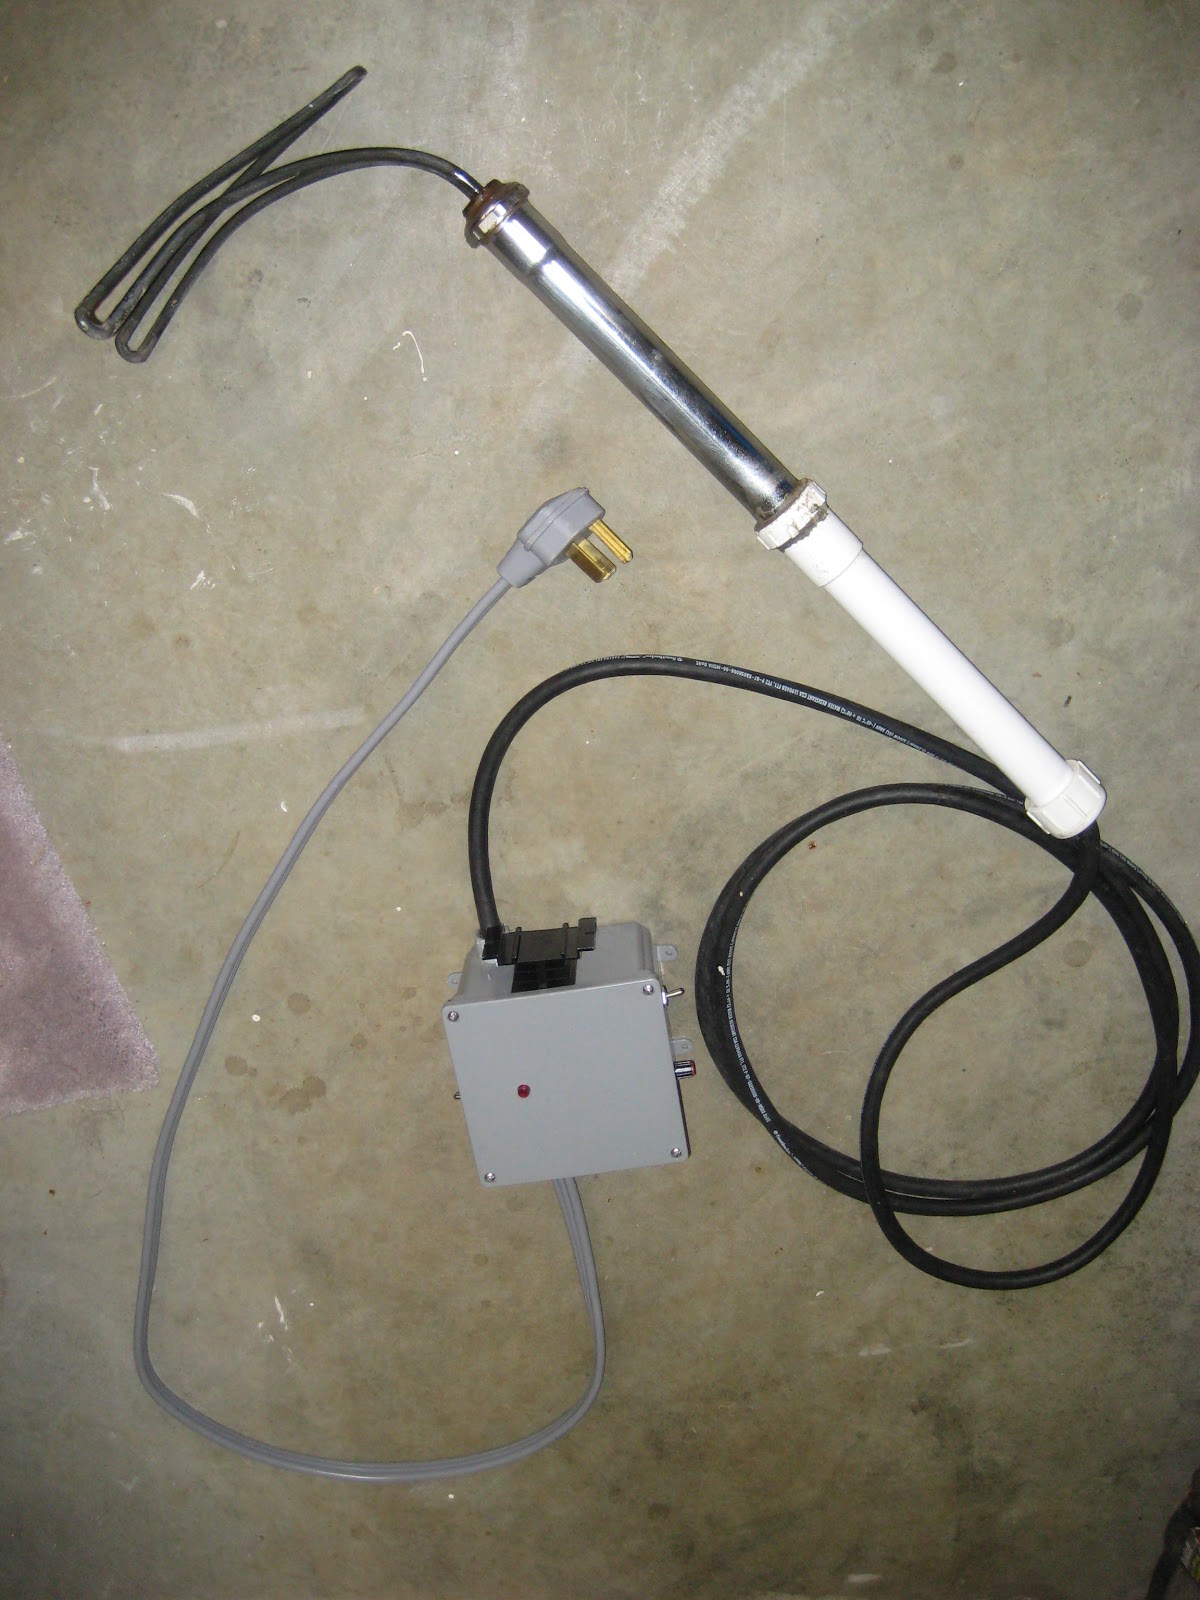
Since my background is in electrical engineering, I was somewhat less intimidated with this approach, although I have to admit that I still had to do a lot of reading to convince myself that I wanted to embark on this path. I had seen several sites that described a heatstick constructed of a water heater element attached to several standard 1-1/2" drain pipe components. Most used 120VAC elements which was convenient for plugging into a standard outlet. I was more interested in a higher wattage element that would be capable of quickly bringing 5-10 gallons of water up to mash temperature (~150 Degrees F) in a reasonable time (10-15minutes). These higher wattage elements required 220VAC, similar to what your electric clothes dryer needs, meaning that I'd need to have a 220VAC outlet installed where I wanted to brew (my basement shop and my garage). Also, I wanted a way to vary the heatstick output so I needed a way to either vary the voltage or the duty-cycle. I chose the latter after reading a thread on Homebrewtalk.com that detailed how a Pulse-Wave Modulator circuit board from Bakatronics could be used to turn on and off a solid-state relay (you'll want this heatsink too) to control the heatstick. The picture below shows a box from HomeDepot that I used to mount the circuit board and the solid stat relay.

Without going into all the details, I ended up with the system shown below, which (with one exception) has serverd me well in the last 6 months of brewing.
The heatstick is placed into my keggle as shown below


As you can see from the photo below, I used some stainless steel bolts to serve as feet that hold the steamer several inches off the bottom of the keggle

I've recently purchased a digital temperature controller that I plan on using to control the heatstick in lieu of the PWM circuit board I now use. More details on that to follow.
In my next post, I'll discuss a few important tips for beginning homebrewers that I learned about the hard way including temperature control of the fermenter, and proper yeast pitching.
Until then...so long for now.....


0 comments:
Post a Comment